Wayland is the successor to the X server (X11, Xorg) to implement the graphics stack on Linux. The Wayland project was actually started in 2008, a year before I created the i3 tiling window manager for X11 in 2009 — but for the last 18 years (!), Wayland was never usable on my computers. I don’t want to be stuck on deprecated software, so I try to start using Wayland each year, and this articles outlines what keeps me from migrating to Wayland in 2026.
Historical context
For the first few years, Wayland rarely even started on my machines. When I was lucky enough for something to show up, I could start some toy demo apps in the demo compositor Weston.
Around 2014, GNOME started supporting Wayland. KDE followed a few years later.
Major applications (like Firefox, Chrome or Emacs) have been slower to adopt
Wayland and needed users to opt into experimental implementations via custom
flags or environment variables, until very recently, or — in some cases, like
geeqie — still as of today.
Unfortunately, the driver support situation remained poor for many years. With nVidia graphics cards, which are the only cards that support my 8K monitor, Wayland would either not work at all or exhibit heavy graphics glitches and crashes.
In the 2020s, more and more distributions announced looking to switch to Wayland by default or even drop their X11 sessions, and RHEL is winding down their contributions to the X server.
Modern Linux distributions like Asahi Linux (for Macs, with their own GPU driver!) clearly consider Wayland their primary desktop stack, and only support X11 on a best-effort basis.
So the pressure to switch to Wayland is mounting! Is it ready now? What’s missing?
Making Wayland start
Hardware
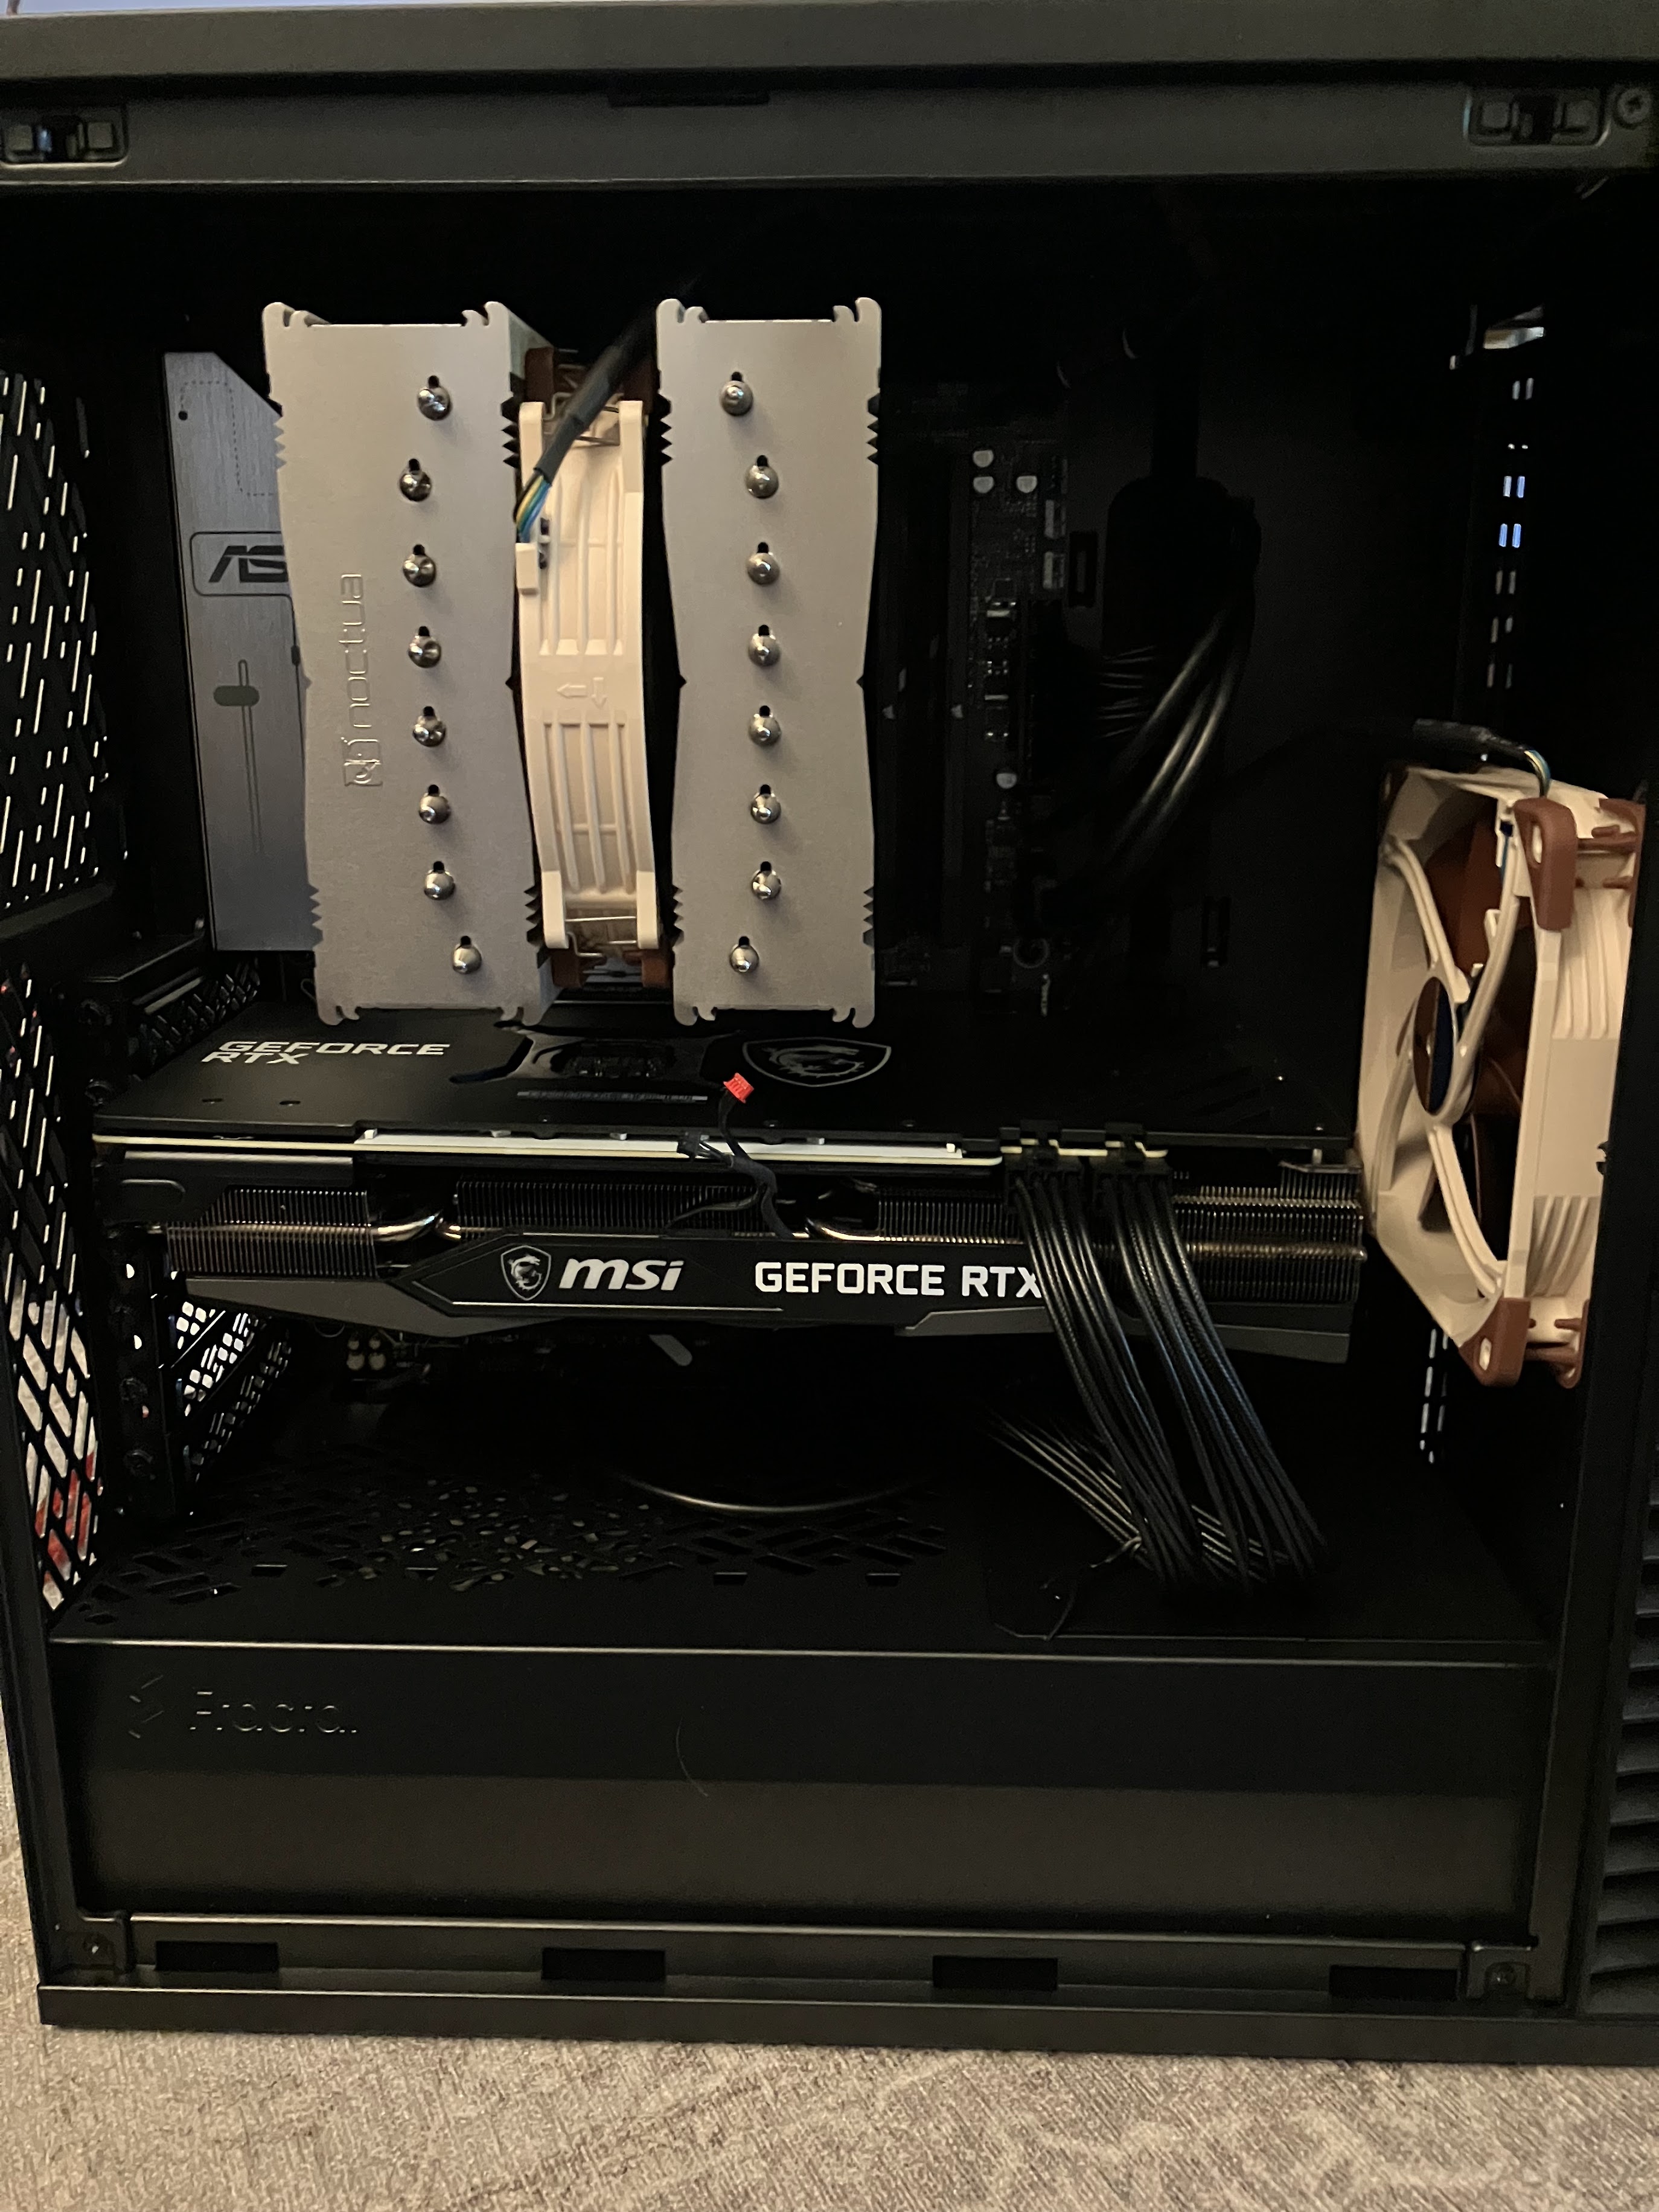
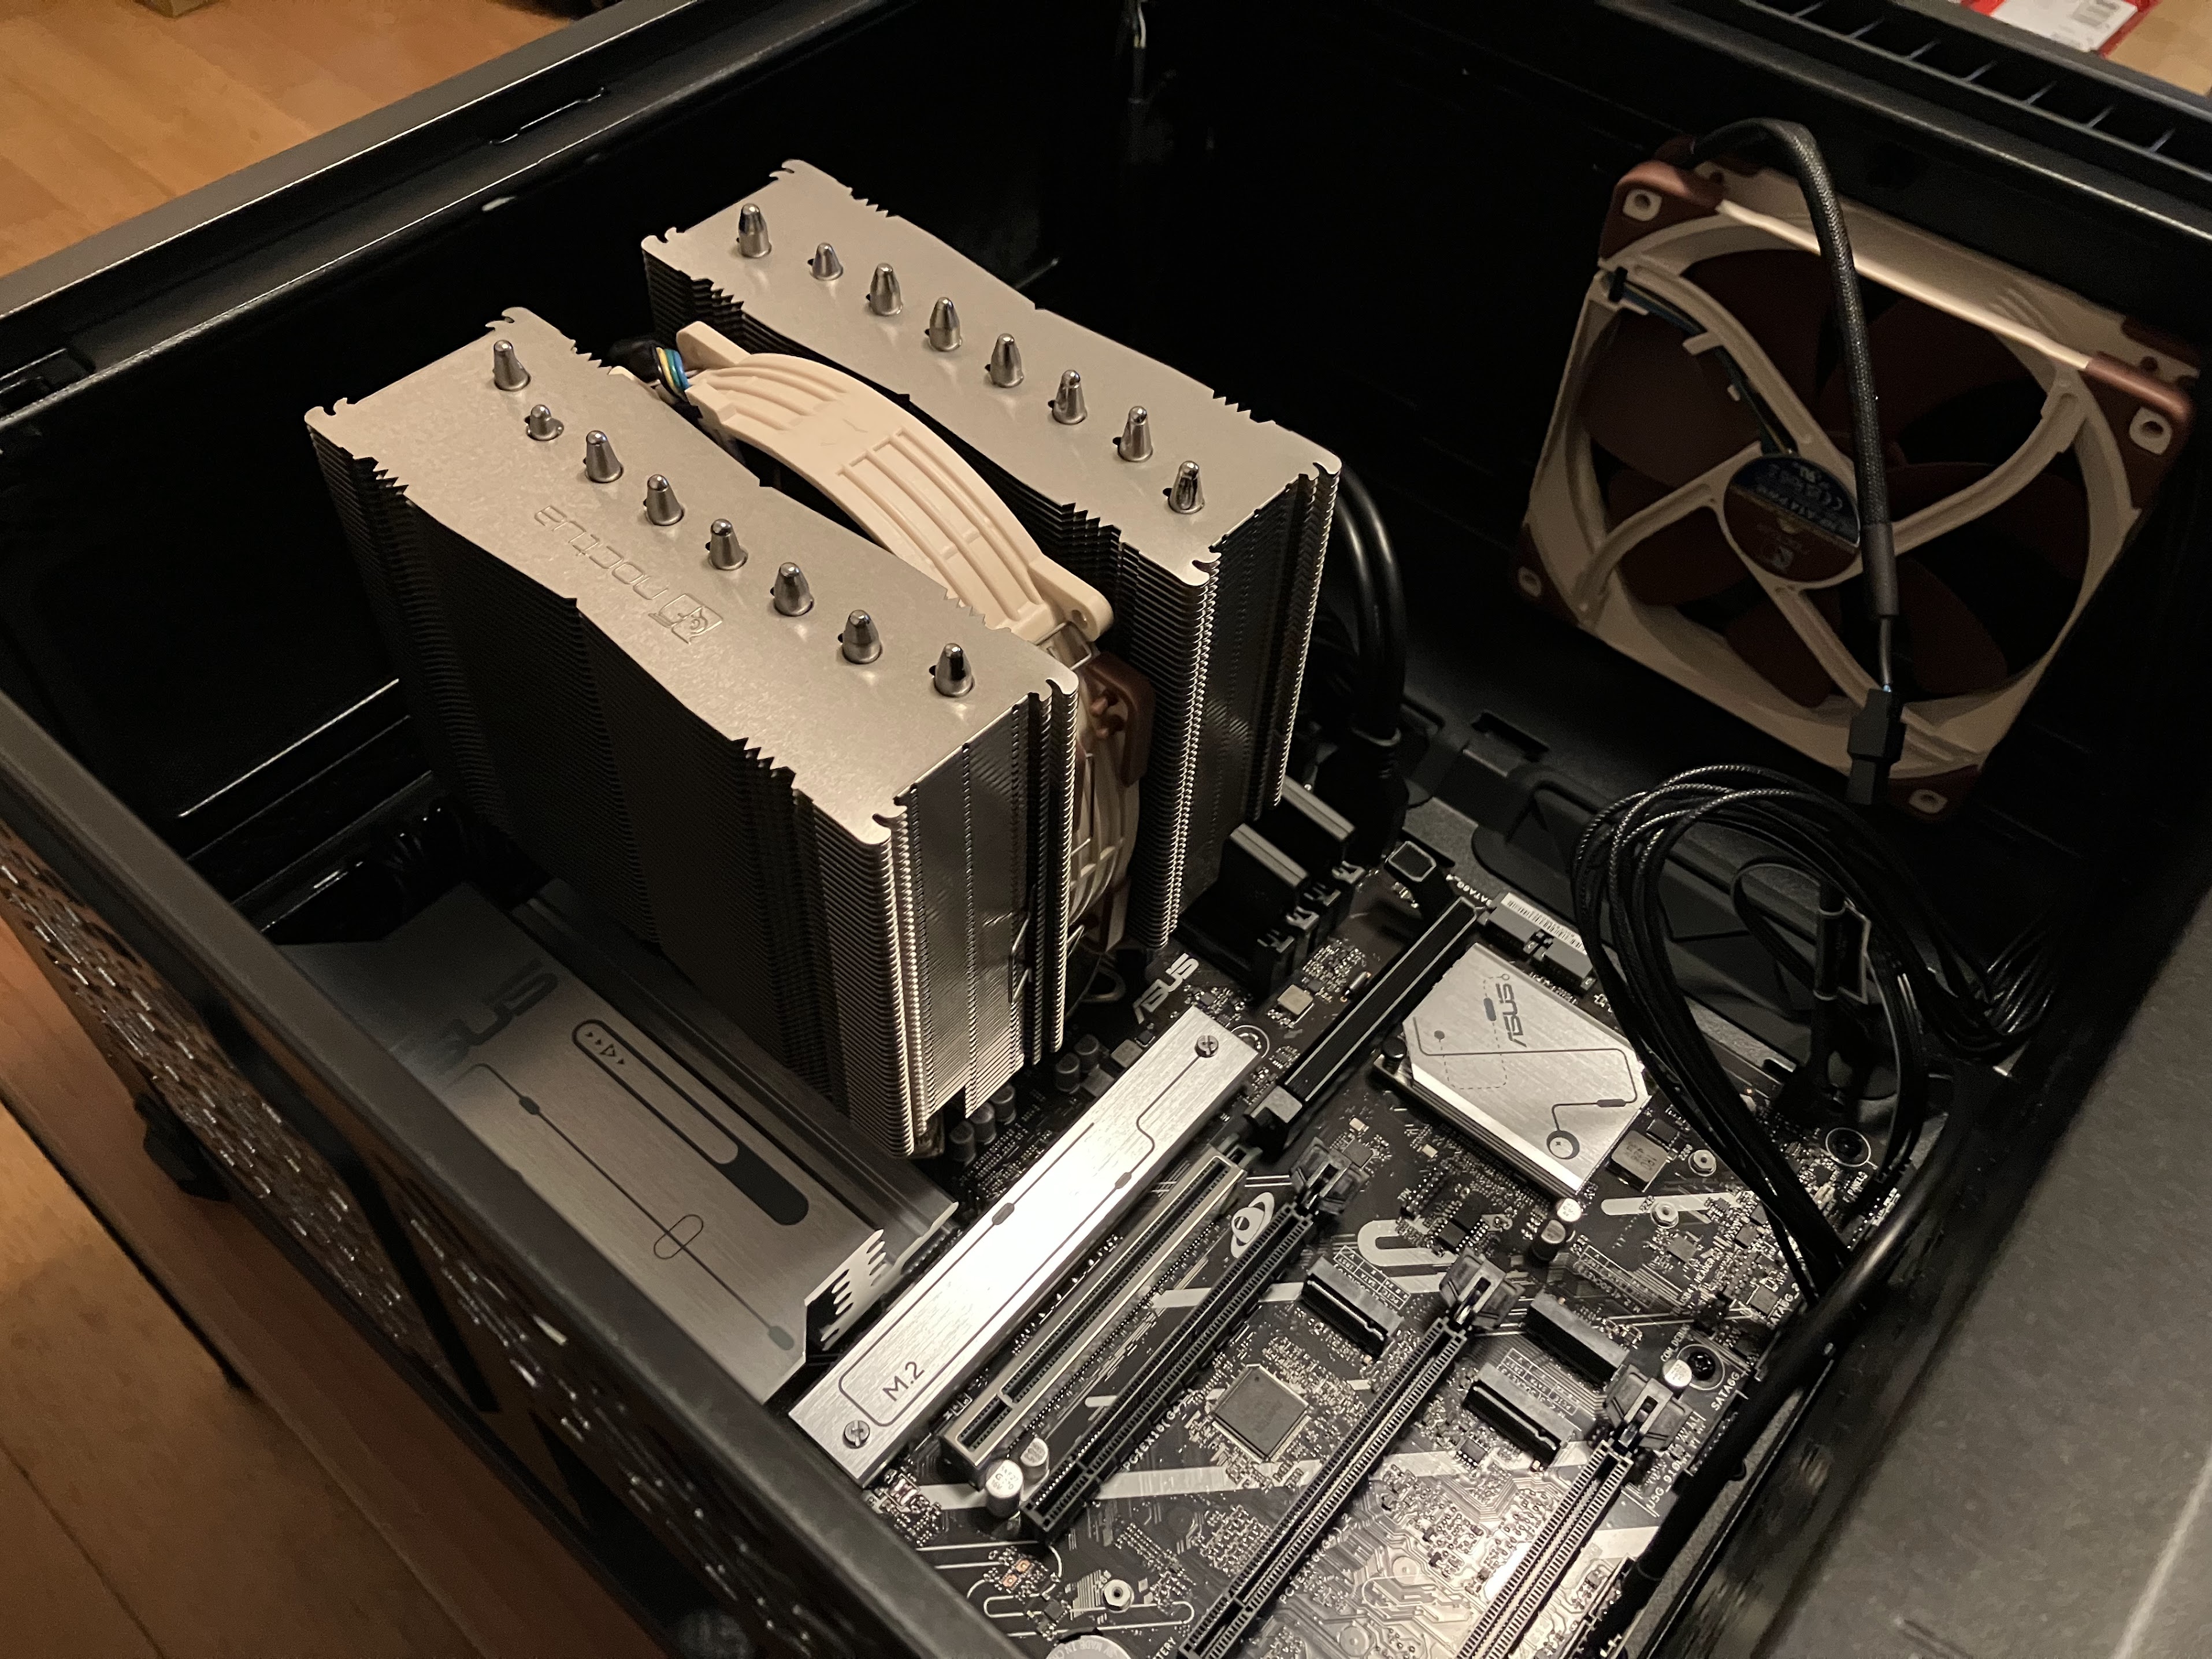
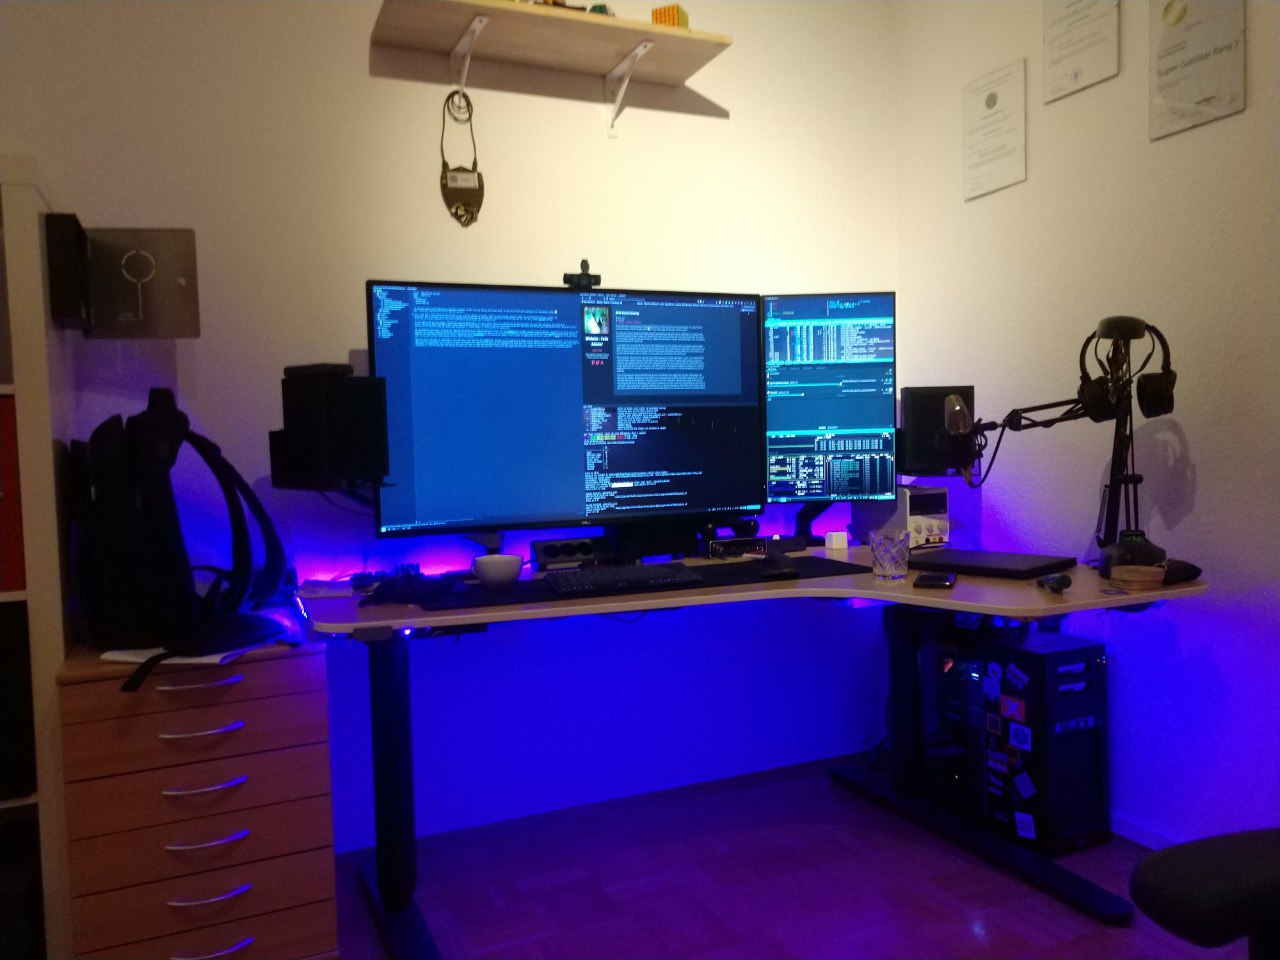
I’m testing with my lab PC, which is a slightly upgraded version of my 2022 high-end Linux PC.
I describe my setup in more details in stapelberg uses this: my 2020 desk setup.
Most importantly for this article, I use a Dell 8K 32" monitor (resolution: 7680x4320!), which, in my experience, is only compatible with nVidia graphics cards (I try other cards sometimes).
Hence, both the lab PC and my main PC contain an nVidia GPU:
- The lab PC contains a nVidia GeForce RTX 4070 Ti.
- The main PC contains a nVidia GeForce RTX 3060 Ti.
(In case you’re wondering why I use the older card in my PC: I had a crash once where I suspected the GPU, so I switched back from the 4070 to my older 3060.)
nVidia driver support
For many years, nVidia drivers were entirely unsupported under Wayland.
Apparently, nVidia refused to support the API that Wayland was using, insisting that their EGLStreams approach was superior. Luckily, with nVidia driver 495 (late 2021), they added support for GBM (Generic Buffer Manager).
But, even with GBM support, while you could now start many Wayland sessions, the session wouldn’t run smoothly: You would see severe graphics glitches and artifacts, preventing you from getting any work done.
The solution for the glitches was explicit sync support: because the nVidia driver does not support implicit sync (like AMD or Intel), Wayland (and wlroots, and sway) needed to get explicit sync support.
Sway 1.11 (June 2025) and wlroots 0.19.0 are the first version with explicit sync support.
Not working: TILE support for 8K monitor
With the nVidia driver now working per se with Wayland, unfortunately that’s
still not good enough to use Wayland in my setup: my Dell UP3218K
monitor requires two DisplayPort 1.4
connections with MST (Multi Stream Transport) and TILE support. This
combination worked just fine under X11 for the last 8+ years.
While GNOME successfully configures the monitor with its native resolution of 7680x4320@60, the monitor incorrectly shows up as two separate monitors in sway.
The reason behind this behavior is that wlroots does not support the TILE
property (issue #1580 from
2019). Luckily,
in 2023, contributor EBADBEEF sent draft merge request
!4154,
which adds support for the TILE property.
But, even with the TILE patch, my monitor would not work correctly: The right
half of the monitor would just stay black. The full picture is visible when
taking a screenshot with grim, so it seems like an output issue. I had a few
exchanges about this with EBADBEEF starting in August 2025 (thanks for taking
a look!), but we couldn’t figure out the issue.
A quarter later, I had made good experiences regarding debugging complex issues with the coding assistant Claude Code (Opus 4.5 at the time of writing), so I decided to give it another try. Over two days, I ran a number of tests to narrow down the issue, letting Claude analyze source code (of sway, wlroots, Xorg, mesa, …) and produce test programs that I could run manually.
Ultimately, I ended up with a minimal reproducer program (independent of
Wayland) that shows how the SRC_X DRM property does not work on nVidia (but
does work on Intel, for example!): I posted a bug report with a video in the
nVidia
forum
and hope an nVidia engineer will take a look!
Crucially, with the bug now identified, I had Claude implement a workaround:
copy the right half of the screen (at SRC_X=3840) to another buffer, and then
display that buffer, but with SRC_X=0.
With that patch applied, for the first time, I can use Sway on my 8K monitor! 🥳
By the way, when I mentioned that GNOME successfully configures the native resolution, that doesn’t mean the monitor is usable with GNOME! While GNOME supports tiled displays, the updates of individual tiles are not synchronized, so you see heavy tearing in the middle of the screen, much worse than anything I have ever observed under X11. GNOME/mutter merge request !4822 should hopefully address this.
Software: NixOS
During 2025, I switched all my computers to NixOS. Its declarative approach is really nice for doing such tests, because you can reliably restore your system to an earlier version.
To make a Wayland/sway session available on my NixOS 25.11 installation, I added
the following lines to my NixOS configuration file (configuration.nix):
# GDM display manager (can launch both X11/i3 and Wayland/Sway sessions)
services.displayManager.gdm.enable = true;
services.displayManager.gdm.autoSuspend = false;

# enable GNOME (for testing)
services.desktopManager.gnome.enable = true;

programs.sway = {
  enable = true;
  wrapperFeatures.gtk = true;
  extraOptions = [ "--unsupported-gpu" ];
};
I also added the following Wayland-specific programs to environment.systemPackages:
environment.systemPackages = with pkgs; [
  # …
  foot          # terminal emulator
  wtype         # replacement for xdotool type
  fuzzel        # fuzzy matching program starter
  wayland-utils # for wayland-info(1)
  gammastep     # redshift replacement
];
Note that activating this configuration kills your running X11 session, if any.
Just to be sure, I rebooted the entire machine after changing the configuration.
Experiment results
With this setup, I spent about one full work day in a Wayland session. Trying to actually get some work done uncovers issues that might not show in casual testing. Most of the day was spent trying to fix Wayland issues 😅. The following sections explain what I have learned/observed.
Desktop: i3 → sway
Many years ago, when Wayland became more popular, people asked on the i3 issue tracker if i3 would be ported to Wayland. I said no: How could I port a program to an environment that doesn’t even run on any of my computers? But also, I knew that with working a full-time job, I wouldn’t have time to be an early adopter and shape Wayland development.
This attitude resulted in Drew DeVault starting the Sway project around 2016, which aims to be a Wayland version of i3. I don’t see Sway as competition. Rather, I thought it was amazing that people liked the i3 project so much that they would go through the trouble of creating a similar program for other environments! What a nice compliment! 😊
Sway aims to be compatible with i3 configuration files, and it mostly is.
If you’re curious, here is what I changed from the Sway defaults, mostly moving
key bindings around for the NEO keyboard layout I
use, and configuring input/output blocks that I formerly configured in my
~/.xsession
file:
my changes to the default Sway config
--- /home/michael/src/sway/config.in	2025-09-24 19:08:38.876573260 +0200
+++ /home/michael/.config/sway/config	2025-12-31 15:50:38.616697542 +0100
@@ -9,19 +9,76 @@
 # Logo key. Use Mod1 for Alt.
 set $mod Mod4
 # Home row direction keys, like vim
-set $left h
-set $down j
-set $up k
-set $right l
+set $left n
+set $down r
+set $up t
+set $right d
 # Your preferred terminal emulator
 set $term foot
 # Your preferred application launcher
-set $menu wmenu-run
+set $menu fuzzel
+
+font pango:Bitstream Vera Sans Mono 8
+
+titlebar_padding 4 2
+
+# Make Xwayland windows recognizeable:
+for_window [shell="xwayland"] title_format "%title [Xwayland]"
+
+workspace_layout stacking
+
+# Open two terminal windows side-by-side on new workspaces:
+# https://github.com/stapelberg/workspace-populate-for-i3
+exec ~/go/bin/workspace-populate-for-i3
+
+exec gammastep -l 47.31:8.50 -b 0.9
+
+input * {
+   xkb_layout "de"
+   xkb_variant "neo"
+	repeat_delay 250
+	repeat_rate 30
+}
+
+input * {
+	accel_profile adaptive
+	pointer_accel 0.2
+}

 ### Output configuration
 #
-# Default wallpaper (more resolutions are available in @datadir@/backgrounds/sway/)
-output * bg @datadir@/backgrounds/sway/Sway_Wallpaper_Blue_1920x1080.png fill
+output * bg /dev/null fill #333333
+output * scale 3
 #
 # Example configuration:
 #
@@ -33,14 +90,41 @@
 #
 # Example configuration:
 #
-# exec swayidle -w \
-#          timeout 300 'swaylock -f -c 000000' \
-#          timeout 600 'swaymsg "output * power off"' resume 'swaymsg "output * power on"' \
-#          before-sleep 'swaylock -f -c 000000'
+exec swayidle -w \
+         before-sleep '~/swaylock.sh' \
+         lock '~/swaylock.sh'
 #
 # This will lock your screen after 300 seconds of inactivity, then turn off
 # your displays after another 300 seconds, and turn your screens back on when
 # resumed. It will also lock your screen before your computer goes to sleep.
+bindsym $mod+l exec loginctl lock-session
+
+  # Notifications
+  bindsym $mod+period exec dunstctl close

 ### Input configuration
 #
@@ -63,11 +147,13 @@
     # Start a terminal
     bindsym $mod+Return exec $term

     # Kill focused window
-    bindsym $mod+Shift+q kill
+    bindsym $mod+Shift+x kill

     # Start your launcher
-    bindsym $mod+d exec $menu
+    bindsym $mod+a exec $menu

     # Drag floating windows by holding down $mod and left mouse button.
     # Resize them with right mouse button + $mod.
@@ -142,12 +228,11 @@
     bindsym $mod+v splitv

     # Switch the current container between different layout styles
-    bindsym $mod+s layout stacking
+    bindsym $mod+i layout stacking
     bindsym $mod+w layout tabbed
-    bindsym $mod+e layout toggle split

     # Make the current focus fullscreen
-    bindsym $mod+f fullscreen
+    bindsym $mod+e fullscreen

     # Toggle the current focus between tiling and floating mode
     bindsym $mod+Shift+space floating toggle
@@ -156,7 +241,7 @@
     bindsym $mod+space focus mode_toggle

     # Move focus to the parent container
-    bindsym $mod+a focus parent
+    bindsym $mod+u focus parent
 #
 # Scratchpad:
 #
@@ -192,37 +277,25 @@
     bindsym Return mode "default"
     bindsym Escape mode "default"
 }
-bindsym $mod+r mode "resize"
+#bindsym $mod+r mode "resize"

 #
 # Status Bar:
 #
 # Read `man 5 sway-bar` for more information about this section.
 bar {
-    position top

     # When the status_command prints a new line to stdout, swaybar updates.
     # The default just shows the current date and time.
-    status_command while date +'%Y-%m-%d %X'; do sleep 1; done
+    status_command i3status
 }
I encountered the following issues with Sway:
-
I don’t know how I can configure the same libinput settings that I had before. See
xinput-list-props-mx-ergo.txtfor what I have on X11. Sway’s availableaccel_profilesettings do not seem to match what I used before. -
The mouse cursor / pointer seems laggy, somehow?! It seems to take longer to react when I move the trackball, and it also seems to move less smoothly across the screen.
Simon Ser suspects that this might be because hardware cursor support might not work with the nVidia drivers currently.
-
No Xwayland scaling: programs started via Xwayland are blurry (by default) or double-scaled (when setting
Xft.dpi: 288). This is a Sway-specific limitation: KDE fixed this in 2022. From Sway issue #2966, I can tell that Sway developers do not seem to like this approach for some reason, but that’s very unfortunate for my migration: The backwards compatibility option of running older programs through Xwayland is effectively unavailable to me. -
Sometimes, keyboard shortcuts seem to be executed twice! Like, when I focused the first of five Chrome windows in a stack and moved that window to another workspace, two windows would be moved instead of one. I also see messages like this one (not exactly correlated with the double-shortcut problem, though):
[ERROR] [wlr] [libinput] event0  - https: kinT (kint36): client bug: event
processing lagging behind by 32ms, your system is too slow
…and that seems wrong to me. My high-end Linux PC certainly isn’t slow by any measure.
GTK: Font size
When I first started GTK programs like GIMP or Emacs, I noticed all fonts were way too large! Apparently, I still had some scaling-related settings that I needed to reset like so:
gsettings reset org.gnome.desktop.interface scaling-factor
gsettings reset org.gnome.desktop.interface text-scaling-factor
Debugging tip: Display GNOME settings using dconf dump / (stored in
~/.config/dconf).
GTK: Backend
Some programs like geeqie apparently need an explicit export GDK_BACKEND=wayland environment variable, otherwise they run in
Xwayland. Weird.
Font rendering
I also noticed that font rendering is different between X11 and Wayland! The difference is visible in Chrome browser tab titles and the URL bar, for example:
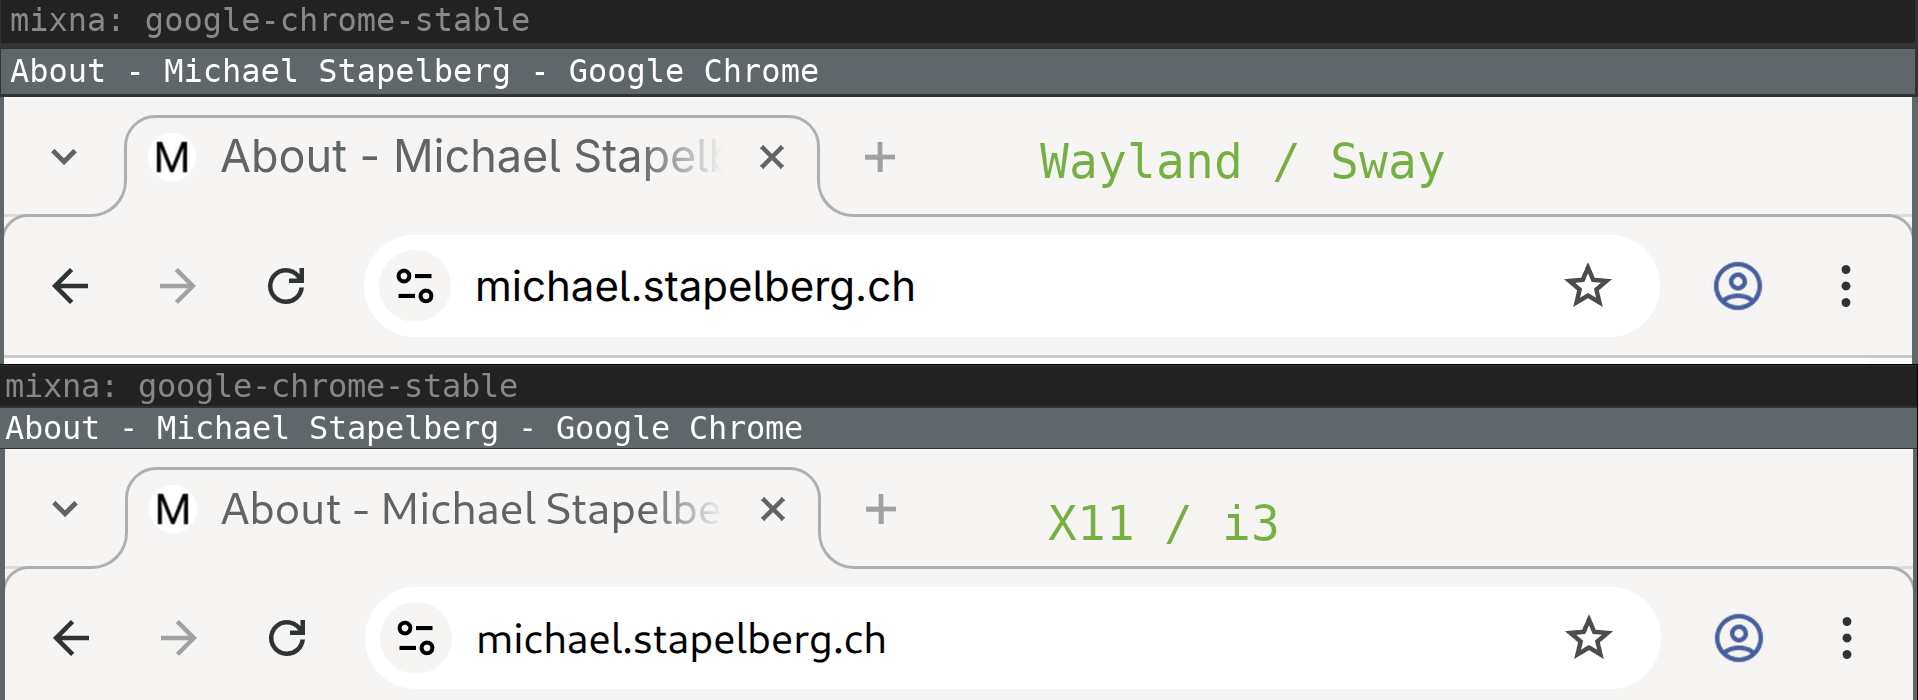
At first I thought that maybe Wayland defaults to different font-antialiasing
and font-hinting settings, but I tried experimenting with the following settings
(which default to font-antialiasing=grayscale and font-hinting=slight), but
couldn’t get things to render like they did before:
gsettings set org.gnome.desktop.interface font-antialiasing 'rgba'
gsettings set org.gnome.desktop.interface font-hinting 'full'
Update: Thanks to
Hugo for pointing out
that under Wayland, GTK3 ignores the ~/.config/gtk-3.0/settings.ini
configuration file and uses dconf exclusively! Setting the following dconf
setting makes the font rendering match:
gsettings set org.gnome.desktop.interface font-name 'Cantarell 11'
Screen locker: swaylock
The obvious replacement for i3lock is
swaylock.
I quickly ran into a difference in architecture between the two programs:
-
i3lock shows a screen locker window. When you kill i3lock, the screen is unlocked.
-
When you kill swaylock, you end up in a Red Screen Of Death.
To get out of this state, you need to restart swaylock and unlock. You can unlock from the command line by sending
SIGUSR1to theswaylockprocess.
This was very surprising to me, but is by (Wayland) design! See Sway issue
#7046 for details, and this quote from
the ext-session-lock-v1 Wayland protocol:
“The compositor must stop rendering and provide input to normal clients. Instead the compositor must blank all outputs with an opaque color such that their normal content is fully hidden.”
OK, so when you start swaylock via SSH for testing, remember to always unlock
instead of just cancelling swaylock with Ctrl+C. And hope it never crashes.
I used to start i3lock via a wrapper script, which turns off the monitor
(input wakes it up):
#!/bin/sh
# Turns on DPMS, mutes all output, locks the screen.
# Reverts all settings on unlock, or when killed.

revert() {
    xset dpms 0 0 0
    pactl set-sink-mute @DEFAULT_SINK@ 0
}
trap revert SIGHUP SIGINT SIGTERM
xset +dpms dpms 15 15 15
(sleep 1 && xset dpms force off) &
pactl set-sink-mute @DEFAULT_SINK@ 1
i3lock --raw 3840x2160:rgb --image ~/i3lock-wallpaper-3840x2160.rgb -n
revert
With Wayland, the DPMS behavior has to be implemented differently, with swayidle:
#!/bin/sh
# Turns on DPMS, mutes all output, locks the screen.
# Reverts all settings on unlock, or when killed.

swayidle -w \
  timeout 5 'swaymsg "output * dpms off"' \
  resume 'swaymsg "output * dpms on"' &
swayidle=$!

revert() {
    kill $swayidle
    pactl set-sink-mute @DEFAULT_SINK@ 0
}
trap revert SIGHUP SIGINT SIGTERM

pactl set-sink-mute @DEFAULT_SINK@ 1
swaylock --image ~/i3lock-wallpaper-3840x2160.jpg
revert
i3 IPC automation
The i3 window manager can be extended via its IPC interface (interprocess communication).
I use a few small tools that use this interface.
I noticed the following issues when using these tools with Sway:
-
Tools using the
go.i3wm.org/i3/v4Go package need a special socket path hook currently. We should probably include transparent handling in the package to ease the transition. -
Tools started with
execfrom the Sway config unexpectedly keep running even when you exit Sway (swaymsg exit) and log into a new session! -
My workspace-populate-for-i3 did not work:
- Sway does not implement i3’s layout saving/restoring because Drew decided in 2017 that the feature is “too complicated and hacky for too little benefit”. Too bad. I have a couple of layouts I liked that I’ll need to replicate differently.
- Sway does not match workspace nodes with
[con_id]criteria. There’s pull request #8980 (posted independently, five days ago) to fix that.
-
My wsmgr-for-i3 worked partially:
- Restoring workspaces (
wsmgr restore) worked. - Sway’s
rename workspacecommand implementation does not seem to pick up workspace numbers from the target name.
- Restoring workspaces (
Terminal: foot
On X11, I use the rxvt-unicode (URxvt) terminal emulator. It has a couple of quality-of-life features that I don’t want to lose, aside from being fast and coming with a minimal look:
- Backwards search through your scrollback (= command output)
- Opening URLs in your scrollback using keyboard shortcuts
- Opening a new terminal window in the same working directory
- Updating the terminal title from your shell
In earlier experiments, I tried Alacritty or Kitty, but wasn’t happy with either.
Thanks to anarcat’s blog post “Wayland: i3 to Sway
migration”, I
discovered the foot terminal emulator, which
looks like a really nice option!
I started a foot.ini config
file
to match my URxvt config, but later I noticed that at least some colors don’t
seem to match (some text lines with green/red background looked different). I’m
not sure why and have not yet looked into it any further.
I noticed the following issues using foot:
-
Pressing Ctrl+Enter (which I seem to do by mistake quite a bit) results in escape sequences, whereas URxvt just treats Ctrl+Enter like Enter.
This can be worked around in your shell (Zsh, in my case), see foot issue #628 for details.
-
Double-clicking on part of a URL with the mouse selects the URL (as expected), but without the
https:scheme prefix! Annoying when you do want to use the mouse.I can hold Ctrl to work around this, which will make
footselect everything under the pointer up to, and until, the next space characters. -
Starting
screen(1)infootresults in not having color support for programs running inside thescreensession. Probably a terminfo-related problem somehow…? I can also reproduce this issue with GNOME terminal. But with URxvt or xterm, it works. -
Selecting text highlights the text within the line, but not the entire line. This is different from other terminal emulators I am used to, but I don’t see an option to change it.
Here’s a screenshot showing
footafter triple-clicking on the right of “kthreadd”: output line highlights the whole line")
But triple-clicking on an echo output line highlights only the contents, not the whole line:

 output line highlights the whole line")

Text editor: Emacs
I find Emacs’s Wayland support rather disappointing. The standard version of Emacs only supports X11, so on Sway, it starts in Xwayland. Because Sway does not support scaling with Xwayland, Emacs shows up blurry (top/background window):

Native Wayland support (bottom/foreground window) is only available in the
pgtk Emacs version (emacs-pgtk on NixOS). pgtk used to be a separate
branch, but was merged in Emacs 29 (July 2023). There seem to be issues
with pgtk on X11 (you get a warning when starting Emacs-pgtk on X11), so there
have to be two separate versions for now…
Unfortunately, the pgtk text rendering looks different than native X11 text
rendering! The line height and letter spacing seems different:
")
I’m not sure why it’s different! Does anybody know how to make it match the old behavior?
Aside from the different text rendering, the other major issue for me is input latency: Emacs-pgtk feels significantly slower (less responsive) than Emacs. This was reported on Reddit multiple times (thread 1, thread 2) and Emacs bug #71591, but there doesn’t seem to be any solution.
I’ll also need a solution for running Emacs remotely. Thus far, I use X11 forwarding over SSH (which works fine and with low latency over fiber connections). I should probably check out waypipe, but have not yet had a chance.
Browser: Chrome
When starting Chrome and checking the chrome://gpu debug page, things look
good:

But rather quickly, after moving and resizing browser windows, the GPU process dies with messages like the following and, for example, WebGL is no longer hardware accelerated:
ERROR:ui/ozone/platform/wayland/gpu/gbm_pixmap_wayland.cc:95] Cannot create bo with format=RGBA_8888 and usage=Scanout|Rendering|Texturing
ERROR:ui/gfx/linux/gbm_wrapper.cc:405] Failed to create BO with modifiers: Invalid argument (22)
ERROR:ui/ozone/platform/wayland/gpu/gbm_pixmap_wayland.cc:95] Cannot create bo with format=RGBA_8888 and usage=Texturing
ERROR:gpu/command_buffer/service/shared_image/shared_image_factory.cc:981] CreateSharedImage: could not create backing.
ERROR:gpu/command_buffer/service/shared_image/shared_image_manager.cc:397] SharedImageManager::ProduceSkia: Trying to Produce a Skia representation from a non-existent mailbox.
ERROR:components/viz/service/gl/exit_code.cc:13] Restarting GPU process due to unrecoverable error. Context was lost.
R:gpu/ipc/client/command_buffer_proxy_impl.cc:321] GPU state invalid after WaitForGetOffsetInRange.
ERROR:content/browser/gpu/gpu_process_host.cc:1005] GPU process exited unexpectedly: exit_code=8704
Of course, using a browser without hardware acceleration is very frustrating,
especially at high resolutions. Starting Chrome with --disable-gpu-compositing
seems to work around the GPU process exiting, but Chrome still does not feel as
smooth as on X11.
Another big issue for me is that Sway does not open Chrome windows on the
workspace on which I closed them. Support for tracking and restoring the
_NET_WM_DESKTOP EWMH atom was added to i3 in January
2016
and to Chrome in May
2016
and Firefox in March
2020.
I typically have 5+ workspaces and even more Chrome windows at any given point, so having to sort through 10+ Chrome windows every day (when I boot my work computer) is very annoying.
Simon Ser said that this would be addressed with
a new Wayland protocol (xdg-session-management, merge request
!18).
Screensharing
I work remotely a lot, so screen sharing is a table-stakes feature for me. I use screen sharing in my browser almost every day, in different scenarios and with different requirements.
In X11, I am used to the following experience with Chrome. I click the “Window” tab and see previews of my windows. When I select the window and confirm, its contents get shared:
")
To get screen sharing to work in Wayland/sway, you need to install
xdg-desktop-portal and xdg-desktop-portal-wlr (the latter is specific to
wlroots, which sway uses).
With these packages set up, this is the behavior I see:
- I can share a Chrome tab.
- I can share the entire monitor.
- I cannot share a specific window (the entire monitor shows up as a single window).
This is a limitation of xdg-desktop-portal-wlr (and
others), which
should be addressed with the upcoming Sway 1.12 release.
I changed my NixOS configuration to use sway and wlroots from git to try it out. When I click on the “Window” tab, I see a chooser in which I need to select a window:

After selecting the window, I see only that window’s contents previewed in Chrome:

After confirming, I get another chooser and need to select the window again. Notably, there is no connection between the previewed window and the chosen window in this second step — if I chose a different window, that’s what will be shared:

Now that window is screenshared (so the feature now works; nice!), but unfortunately in low resolution, meaning the text is blurry for my co-workers.
I reported this as xdg-desktop-portal-wlr issue #364 and it seems like the issue is that the wrong scale factor is applied. The patch provided in the issue works for me.
But, on a high level, the whole flow seems wrong: I shouldn’t see a chooser when clicking on Chrome’s “Window” tab. I should see previews of all windows. I should be able to select the window in Chrome, not with a separate chooser.
Scaling Glitches
I also noticed a very annoying glitch when output scaling is enabled: the contents of (some!) windows would “jump around” as I was switching between windows (in a tabbed or stacked container) or between workspaces.
I first noticed this in the foot terminal emulator, where the behavior is as follows:
- Switch focus to another
footterminal by changing workspaces, or by switching focus within a stacked or tabbed container. - The new
footterminal shows up with its text contents slightly offset. - Within a few milliseconds,
foot’s text jumps to the correct position.
I captured the following frame with my iPhone just as the content was moving a few pixels, shortly after switching focus to this window:

Later, I also noticed that Chrome windows briefly show up blurry after switching.
My guess is that because Sway sets the scale factor to 1 for invisible windows, when switching focus you see a scale-1 content buffer until the application provided its scale-3 content buffer.
Notifications: dunst
dunst supports Wayland natively. I tried dunst 1.13 and did not notice any issues.
Picker: rofi
rofi works on Wayland since v2.0.0 (2025-09-01).
I use rofi with rofimoji as my Emoji
picker. For text input, instead of xdotool, wtype seems to work. I didn’t
notice any issues.
Screenshots: grim?
Instead of my usual choice maim(1)
, I tried grim(1)
, but unfortunately grim’s -T flag to select the
window to capture is rather cumbersome to use (and captures in 1x scale).
Does anyone have any suggestions for a good alternative?
Conclusion
Finally I made some progress on getting a Wayland session to work in my environment!
Before giving my verdict on this Wayland/sway experiment, let me explain that my experience on X11/i3 is really good. I don’t see any tearing or other artifacts or glitches in my day-to-day computer usage. I don’t use a compositor, so my input latency is really good: I once measured it to approximately 763 μs in Emacs on X11 with my custom-built keyboard (plus output latency), see kinX: latency measurement (2018).
So from my perspective, switching from this existing, flawlessly working stack (for me) to Sway only brings downsides. I observe new graphical glitches that I didn’t have before. The programs I spend most time in (Chrome and Emacs) run noticeably worse. Because of the different implementations, or because I need to switch programs entirely, I encounter a ton of new bugs.
For the first time, an on-par Wayland experience seems within reach, but realistically it will require weeks or even months of work still. In my experience, debugging sessions quickly take hours as I need to switch graphics cards and rewire monitors to narrow down bugs. I don’t have the time to contribute much to fixing these numerous issues unfortunately, so I’ll keep using X11/i3 for now.
For me, a Wayland/Sway session will be ready as my daily driver when:
- Sway no longer triggers some key bindings twice some times (“ghost key presses”)
- I no longer see glitches when switching between windows or workspaces in Sway.
- Chrome is continuously hardware-accelerated.
- Chrome windows are restored to their previous workspace when starting.
- Emacs either:
- Runs via Xwayland and Sway makes scaling work.
- Or if its
pgtkvariant fixes its input latency issues and can be made to render text the same as before somehow.


 vs. MacBook Pro (right)")


")
")
")